One-Pan Shrimp Fried Rice: Your Guide to Crispy Rice & Perfect Shrimp
Imagine a vibrant, flavorful dish, packed with tender shrimp, crisp vegetables, and perfectly textured rice—all cooked to perfection in a single pan. That’s the magic of homemade shrimp fried rice, a quick and satisfying meal that rivals your favorite takeout. Far from being a complicated culinary endeavor, this one-pan wonder is accessible to home cooks of all skill levels. Our focus today is on unlocking the secrets to achieving that irresistible crispy rice and succulent, never-rubbery shrimp, transforming your weeknight dinner into a restaurant-worthy experience.
Whether you’re looking for a swift family dinner—one that even the kids will love—or a simple yet sophisticated meal for yourself, shrimp fried rice delivers. It's hearty, colorful, and packed with flavor, making it an ideal choice when you need something delicious in about 30 minutes.
The Secret to Restaurant-Quality Shrimp Fried Rice at Home
Achieving truly exceptional shrimp fried rice means paying attention to two critical components: the rice itself and the star protein, shrimp. Getting these right elevates the entire dish from good to absolutely glorious.
Mastering the Rice: Achieving that Irresistible Crisp
The hallmark of great fried rice isn't just fluffy grains, but also those delightful, slightly crispy bits that add texture and depth of flavor. Here's how to achieve it:
- Start with Day-Old (or Leftover) Rice: This is arguably the most crucial tip. Freshly cooked rice is too moist and will steam rather than fry, resulting in a gummy texture. Day-old rice, ideally refrigerated overnight, has dried out considerably, allowing the individual grains to separate and crisp up beautifully. If you don't have leftover rice, you can cook it in advance and spread it on a baking sheet to cool and dry for a few hours before using.
- The Right Rice Variety: While various types of rice can be used, medium or long-grain white rice (like jasmine or basmati) is ideal. Their starch content allows them to become both fluffy and crispy without turning mushy.
- High Heat is Your Friend: Fried rice needs to be cooked quickly over high heat. This rapid cooking ensures that the moisture evaporates quickly, promoting browning and crisping rather than steaming. A large nonstick skillet or a wok is perfect for this, allowing the rice to spread out and make contact with the hot surface.
- Don't Overcrowd the Pan: This ties into high heat. If you add too much rice at once, the pan's temperature will drop, and the rice will steam instead of fry. Cook in batches if necessary, or use a sufficiently large pan.
- Let it Sizzle: Once you add the rice to the hot pan, spread it out into a single layer and resist the urge to stir constantly. Let it sit undisturbed for a minute or two. You'll hear it sizzle, and this is where those coveted crispy bits form. Then, stir and repeat the process for even crisping.
Perfecting the Shrimp: Tender, Juicy, Never Rubbery
Overcooked shrimp is a common pitfall, leading to a tough, rubbery texture. With a few simple steps, you can ensure your shrimp is perfectly tender and bursting with flavor:
- Choose the Right Shrimp: Medium or large raw shrimp, peeled and deveined, are ideal. If using frozen shrimp, make sure to thaw it completely in cold water and, crucially, pat it very dry with paper towels before cooking. Excess moisture will cause the shrimp to steam rather than sear, hindering that beautiful pink exterior.
- Quick Sear, High Heat: Like the rice, shrimp benefits from high heat and quick cooking. Heat your oils (a mix of olive oil and a touch of sesame oil works wonderfully for flavor and searing) until shimmering. Add the shrimp in a single layer, ensuring not to overcrowd the pan.
- The 3-Minute Rule (Approximately): Shrimp cooks incredibly fast. Depending on its size, it generally takes about 1.5 to 2 minutes per side. Cook until the shrimp turns bright pink on the outside and is just opaque throughout. Remove it from the pan immediately, even if it looks slightly underdone—it will continue to cook a little from residual heat. This ensures maximum tenderness.
- Remove Before Adding Back: A key technique for fried rice is to cook the shrimp separately first, then transfer it to a plate. This prevents it from overcooking while you prepare the other ingredients. It gets added back in at the very end, just long enough to reheat.
Essential Ingredients for Flavorful One-Pan Shrimp Fried Rice
Beyond the shrimp and rice, a handful of core ingredients bring this dish to life. The beauty of this recipe lies in its simplicity and the ability to customize.
- Oils: A combination of olive oil for high-heat cooking and sesame oil for its distinctive nutty aroma is perfect. The sesame oil adds that unmistakable fried rice flavor.
- Shrimp: As discussed, a pound of medium to large, peeled and deveined shrimp will serve four generously.
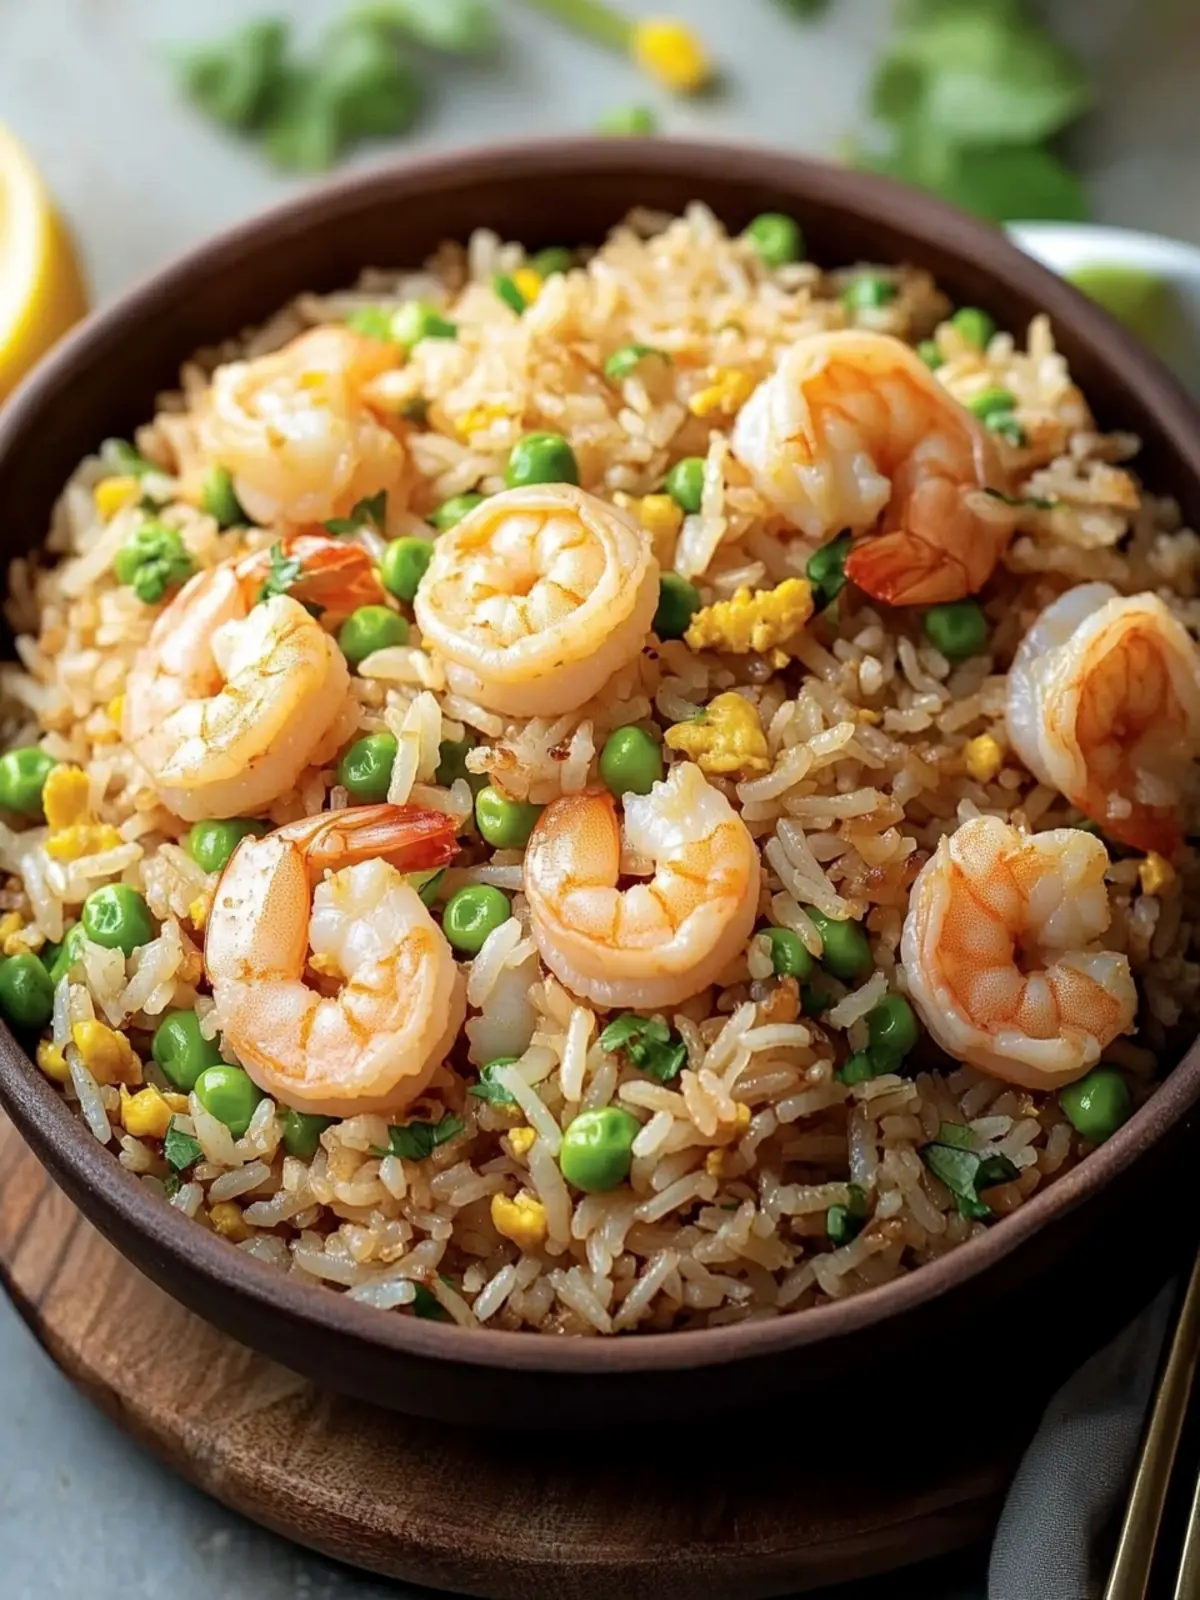
- Frozen Vegetables: A colorful medley of frozen peas, carrots, and corn provides texture, nutrients, and a pop of color. These are convenient and cook quickly. You could also include ingredients like celery or snow peas for extra crunch, making this a truly kid-friendly shrimp fried rice thanks to its familiar and appealing components.
- Aromatics: Garlic is non-negotiable for depth of flavor. Two cloves, finely minced, is a good starting point, but feel free to add more to taste. Fresh ginger (finely grated) is another excellent addition for an extra layer of warmth and zest.
- Eggs: Three lightly beaten large eggs, scrambled right in the pan, add richness and protein, making the dish even heartier.
- Cooked Rice: Again, day-old cooked rice is king here.
- Green Onions: Thinly sliced green onions (scallions) are used for both cooking and garnish, providing a fresh, pungent bite and vibrant color.
- Soy Sauce: Low-sodium soy sauce is essential. It delivers that umami punch without making the dish overly salty, allowing you to season to taste later.
- Seasonings: Salt and freshly ground black pepper are used to finish the dish, enhancing all the other flavors.
Your Step-by-Step Guide to One-Pan Perfection
The true advantage of this easy homemade shrimp fried rice is how quickly it comes together once you have your ingredients prepped. Remember, "mise en place" (having all your ingredients ready and measured) is key for fried rice!
- Prepare Your Ingredients: Peel and devein your shrimp, patting it dry. Mince your garlic. Slice your green onions. Beat your eggs. Ensure your day-old rice is ready.
- Cook the Shrimp: Heat 2 tablespoons each of sesame oil and olive oil in a large nonstick skillet or wok over medium-high heat until shimmering. Add the shrimp in a single layer. Cook for about 1.5 minutes per side, until bright pink and opaque. Transfer the cooked shrimp to a plate using a slotted spoon, leaving the flavorful oils and any juices in the pan. Set the shrimp aside.
- Sauté the Vegetables: Add your frozen peas, carrots, and corn to the skillet. Cook, stirring intermittently, for about 2 minutes until they begin to soften. Add the minced garlic (and ginger, if using) and cook for another minute until fragrant.
- Scramble the Eggs: Push the vegetables to one side of the skillet, creating a clear space. Pour the lightly beaten eggs into the empty side. Scramble the eggs, stirring as necessary, for 3 to 4 minutes until fully cooked and fluffy. Once cooked, you can break them up and mix them slightly with the vegetables.
- Combine and Season: Return the cooked shrimp to the skillet. Add the day-old rice and most of the sliced green onions (reserving some for garnish). Drizzle with 3 tablespoons of low-sodium soy sauce. Season with about ½ teaspoon each of salt and freshly ground black pepper, or more to taste.
- Finish the Dish: Stir everything together gently but thoroughly, ensuring the rice, shrimp, vegetables, and eggs are well combined and coated with the sauce. Continue to cook for about 2 minutes, stirring occasionally, until the shrimp is reheated and the rice has a chance to develop those desired crispy bits.
- Serve Immediately: Garnish with the remaining fresh green onions and serve hot.
Pro Tips for the Ultimate Shrimp Fried Rice Experience
- Don't Overcrowd the Pan: This cannot be stressed enough. If your pan is too small for the amount of ingredients, work in batches, especially when cooking the shrimp and frying the rice. Overcrowding lowers the pan temperature and leads to steaming rather than frying.
- Taste and Adjust: Always taste your fried rice before serving. You might want more soy sauce, a pinch more salt, or even a dash of white pepper for an authentic touch. A tiny splash of rice vinegar at the end can also brighten the flavors.
- Add a Spicy Kick: For those who love a bit of heat, drizzle a touch of chili oil over your serving or stir in a pinch of red pepper flakes with the garlic.
- Experiment with Vegetables: While peas, carrots, and corn are classic, feel free to add other quick-cooking vegetables like diced bell peppers, chopped broccoli florets, or even chopped cabbage. Add them early with the frozen veggies.
- Garnish for Freshness: A final sprinkle of fresh green onions, a drizzle of extra sesame oil, or even a few cilantro leaves can elevate the presentation and add a final burst of flavor.
Creating one-pan shrimp fried rice at home is a rewarding experience. With a focus on dried-out day-old rice and perfectly seared shrimp, you can achieve that sought-after restaurant quality with ease. This versatile, flavorful, and incredibly quick meal is sure to become a staple in your kitchen, proving that delicious, satisfying dinners don't have to be complicated or messy. So grab your pan and get ready to enjoy the ultimate homemade fried rice!
